
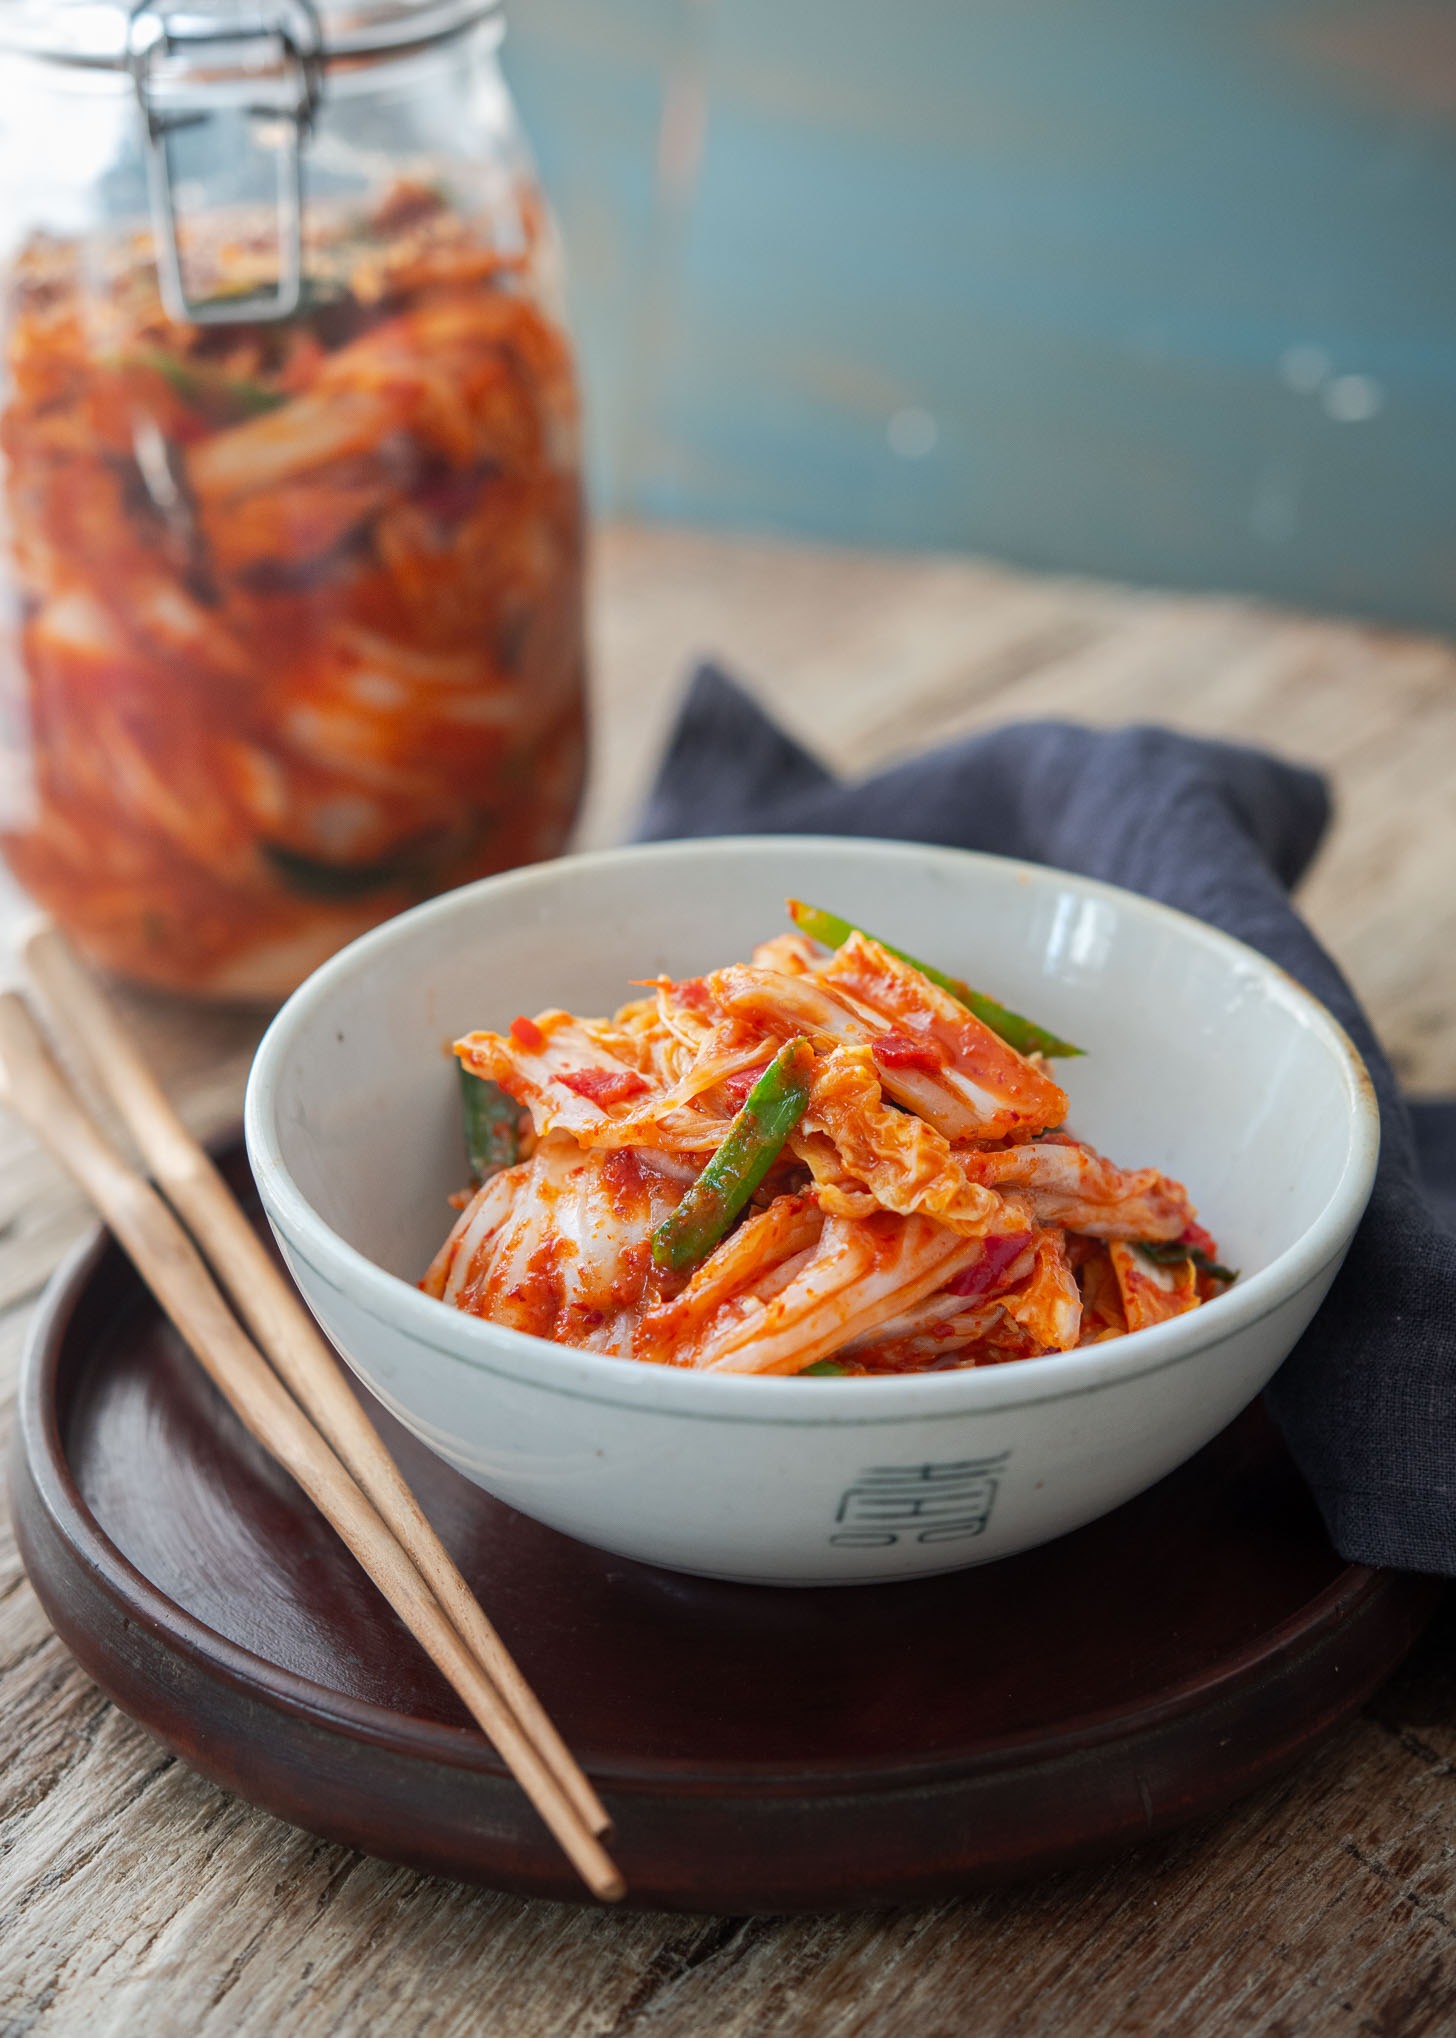
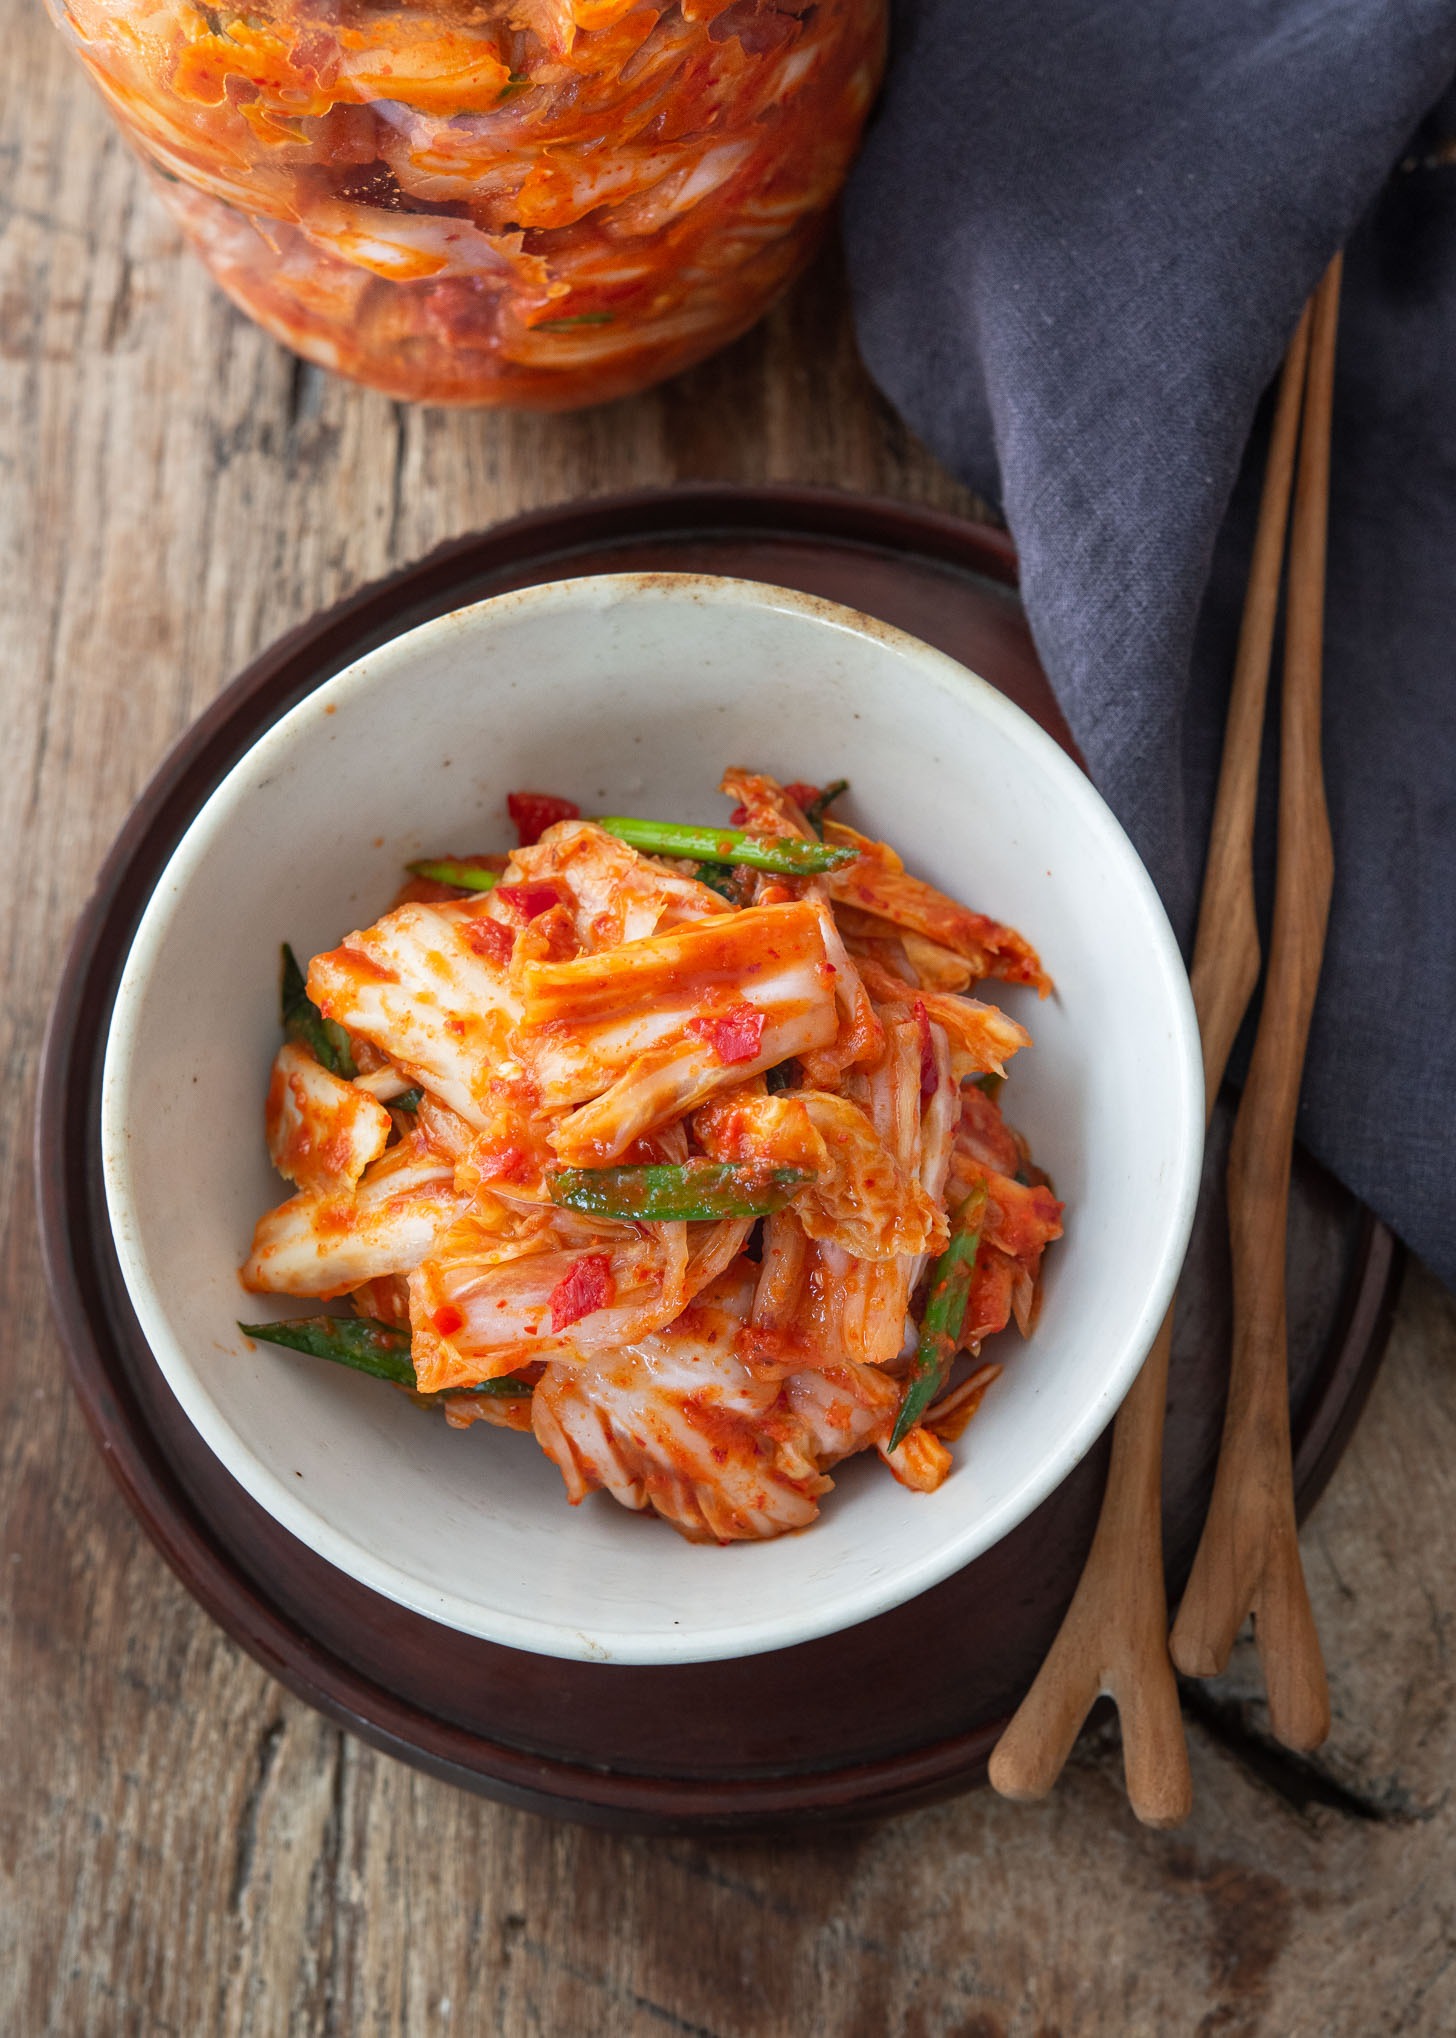
Ultimate Vegan Kimchi Recipe
Crisp, tangy vegan kimchi recipe that delivers authentic Korean flavors without fish sauce. Learn the secrets to perfect fermentation, ingredients, and flavorful substitutes. A must-try for vegans and kimchi enthusiasts alike!
Though I’m neither seeking for vegan nor vegetarian diet, I’ve developed a deep appreciation for kimchi crafted without the traditional fish sauce. This vegan kimchi recipe, a beloved choice among Korean vegans, stands as a testament to the flavors of authentic Buddhist temple food.
Expect a blend of crispy and crunchy textures, combined with a rich umami depth that’s surprisingly light and adaptable, making it perfect for various dietary needs and preferences.

Get new recipes via email
Understanding Kimchi: A Fermented Korean Staple
Kimchi is a traditional Korean side dish, a spicy and tangy combination of fermented cabbage and seasonings. This age-old delicacy, often considered the soul of Korean cuisine, has transcended its native borders to become a global favorite.
Its intricate fermentation process not only imparts a distinctive taste but also offers numerous health advantages such as enhanced gut health, reduced inflammation, and improved digestion.
To know more about this Korean culinary wonder, explore my straightforward kimchi recipe.
Why Choose Vegan Kimchi?
- Inclusivity: Vegan kimchi caters not only to vegans and vegetarians but also to those with food allergies.
- Versatility: This kimchi offers a flavorful touch that enhances a wide range of dishes.
- Health Benefits: Being a fermented food, vegan kimchi significantly boosts gut health.
Unlocking the Full Flavor of Kimchi
Kimchi typically relies on fish sauce for its unique flavor profile. However, when creating a vegan version, simply removing this ingredient isn’t enough. This omission can risk losing the iconic umami depth that makes kimchi a beloved delicacy.
But here’s a culinary secret! By blending vegetable-fruit stock with Korean soup soy sauce, you can craft a vegan kimchi that closely mirrors the rich taste that fish sauce and shrimp offer.
The Magic of Korean Soup Soy Sauce
‘Guk-ganjang‘ (국간장) is a soy-based gem in Korean cuisine. Made from fermented soybeans, it captures the savory punch of fish sauce without the fishy aroma, ensuring your kimchi keeps its radiant red color. A staple in vegan Korean dishes and Buddhist temple recipes, it offers an authentic touch to vegan kimchi.
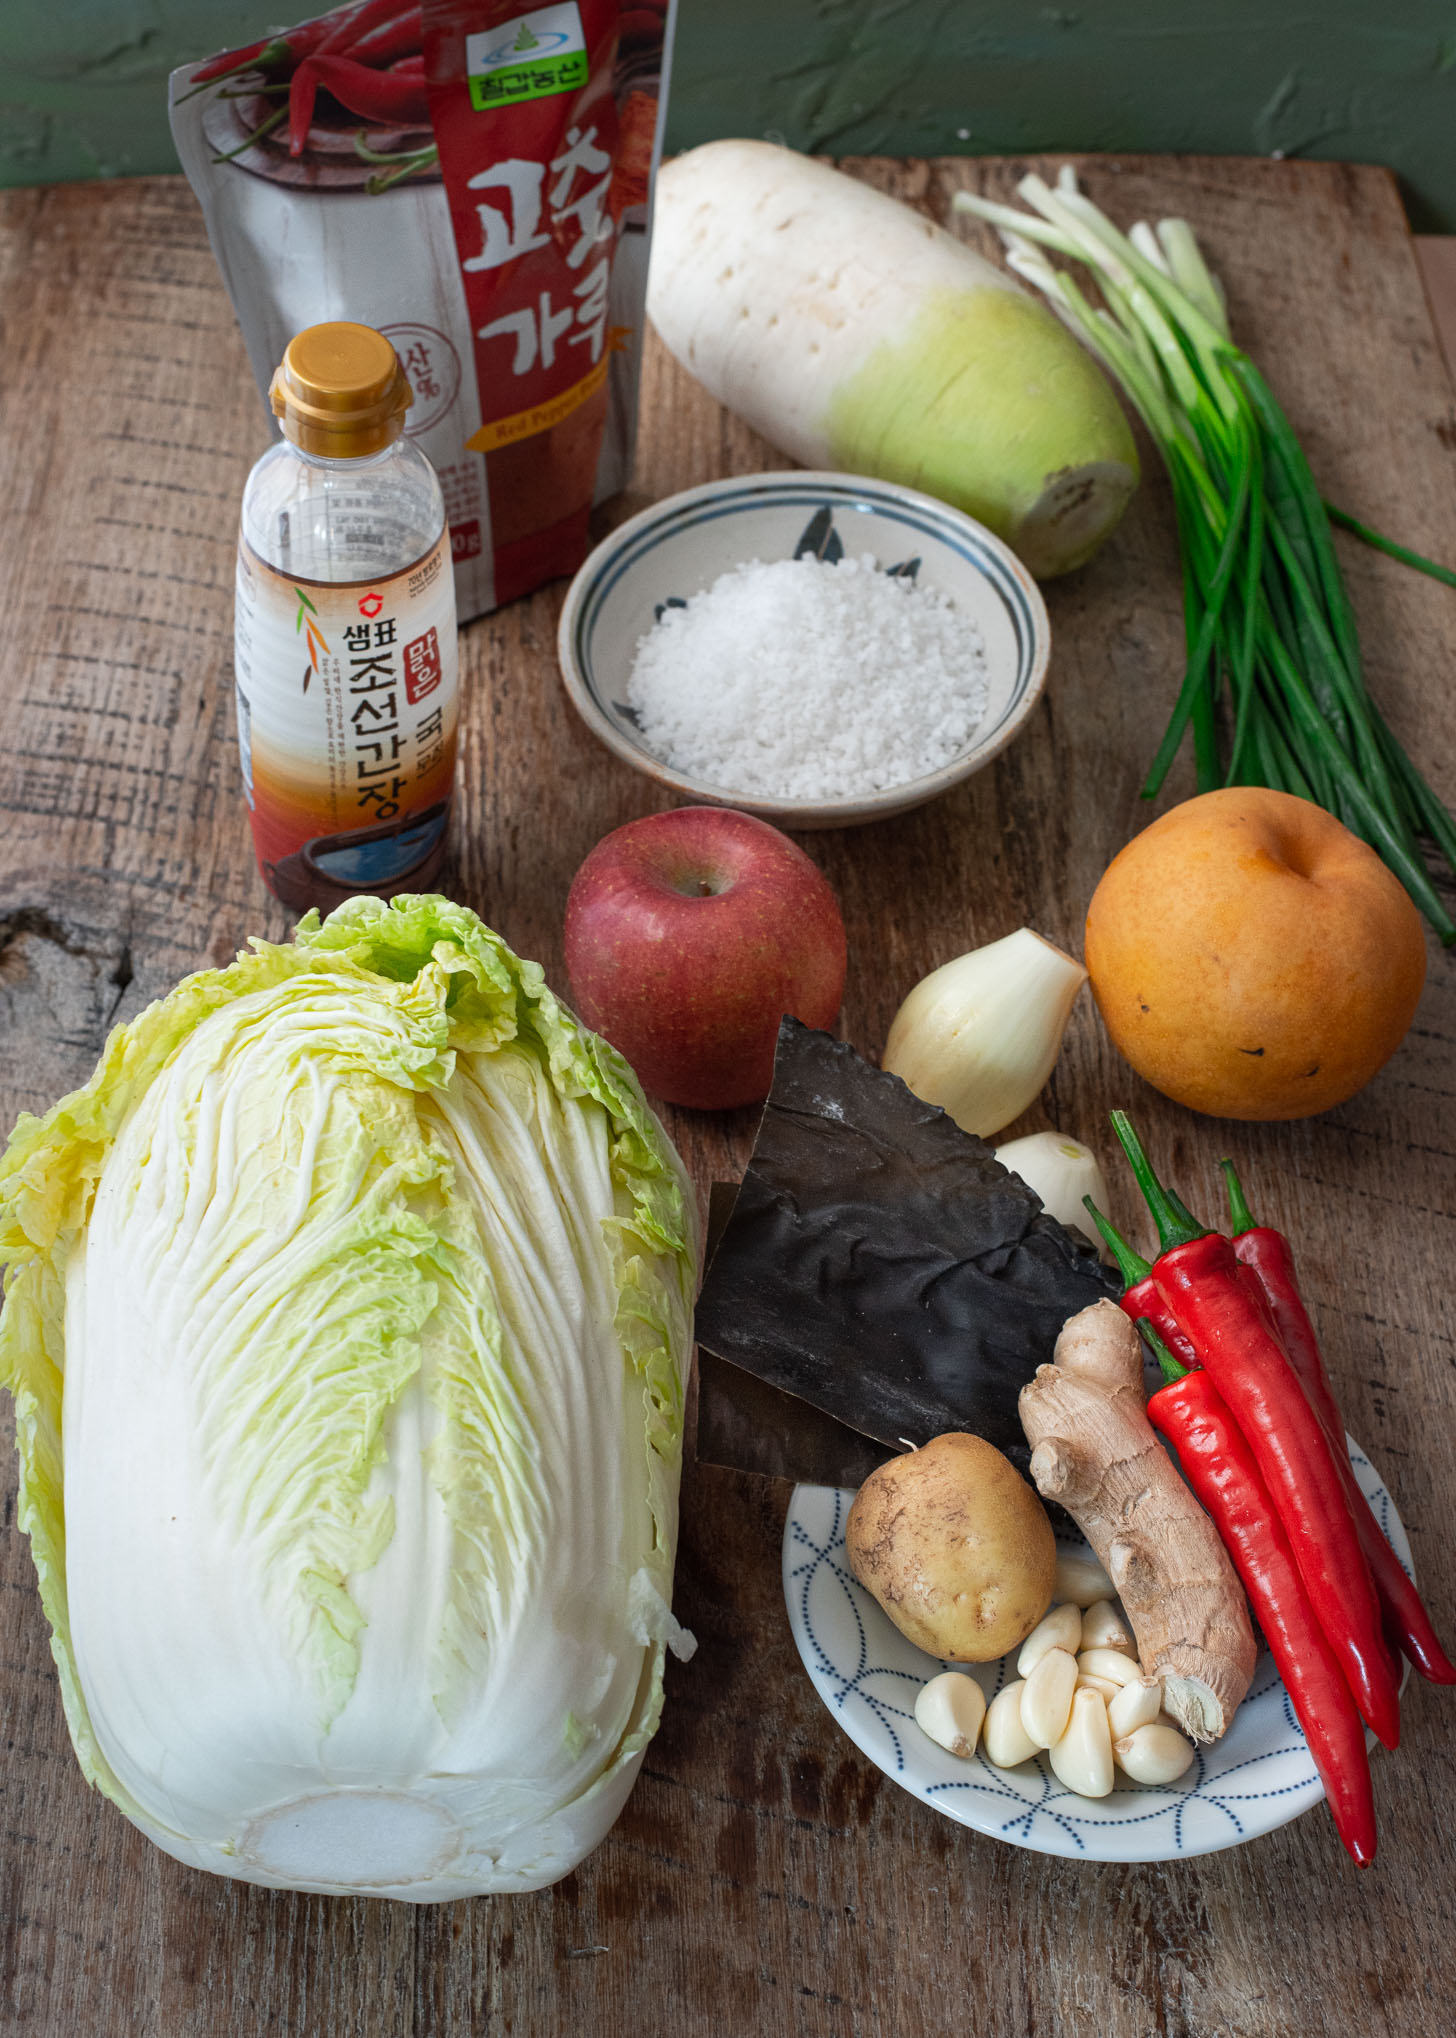
Essential Ingredients & Their Alternatives
- Napa Cabbage: The foundation of vegan kimchi, often called Chinese cabbage. A 4.5 lb cabbage is ideal; however, if using a 2.2 lb variant, reduce the other ingredients by half.
- Can’t find Napa? Opt for green cabbage instead.
- Salt: Korean coarse sea salt is best. If unavailable, use Kosher salt at 1/4 the quantity. Table salt isn’t recommended.
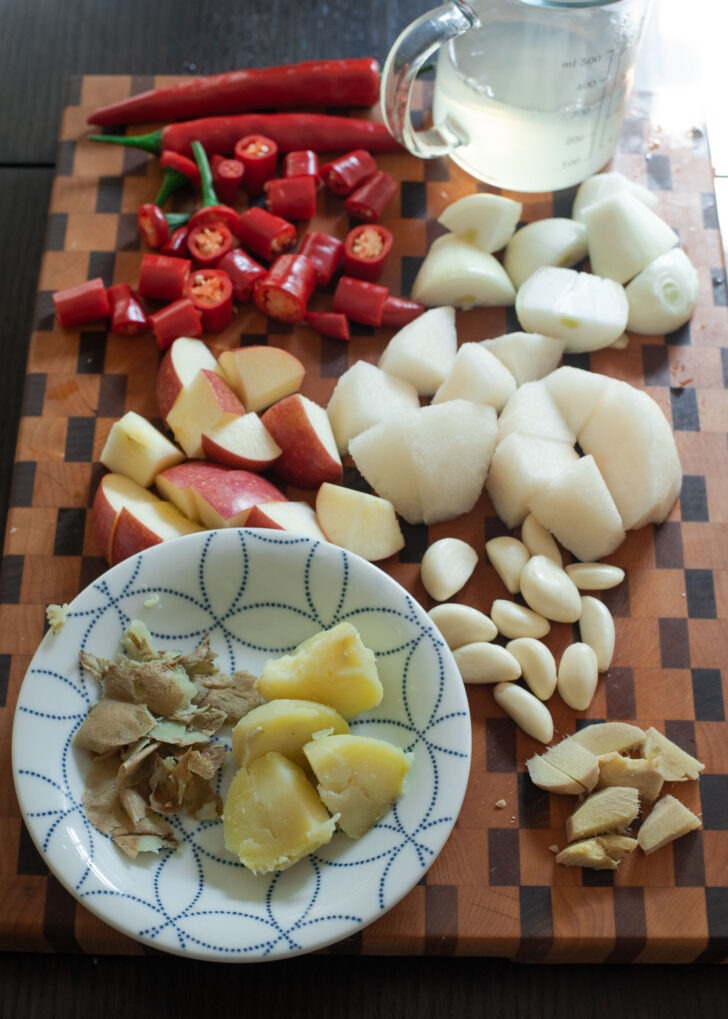
- Fresh Ingredients: Onion, garlic, and ginger form the trio for kimchi’s savory heart.
- Korean Pear & Apple: I blend half of each into the kimchi paste and use the rest for the vegetable-fruit stock. Their natural sweetness counters the kimchi’s salt and tang, eliminating sugar’s need.
- If no Asian pear, go for firm bosc pear. Persimmon is a great apple alternative.
- Korean Chili Flakes (Gochugaru): Central to kimchi’s flavor profile. Its taste is irreplaceable.
- Korean Soup Soy Sauce (Guk-ganjang): Boosts kimchi’s umami.
- Starchy Base: Cooked potato or white rice is vital for fermentation, nourishing the beneficial bacteria.
- Fresh Red Chili: While optional, it enhances flavor and color.
- Vegetable-Fruit Stock: The key to kimchi’s lightness. It’s crafted from Korean pear, red apple, onion or leek, radish (Korean or daikon), and dried sea kelp, offering a burst of flavor.
How to Make Vegan Kimchi: Step-by-Step Guide
For salting the cabbage
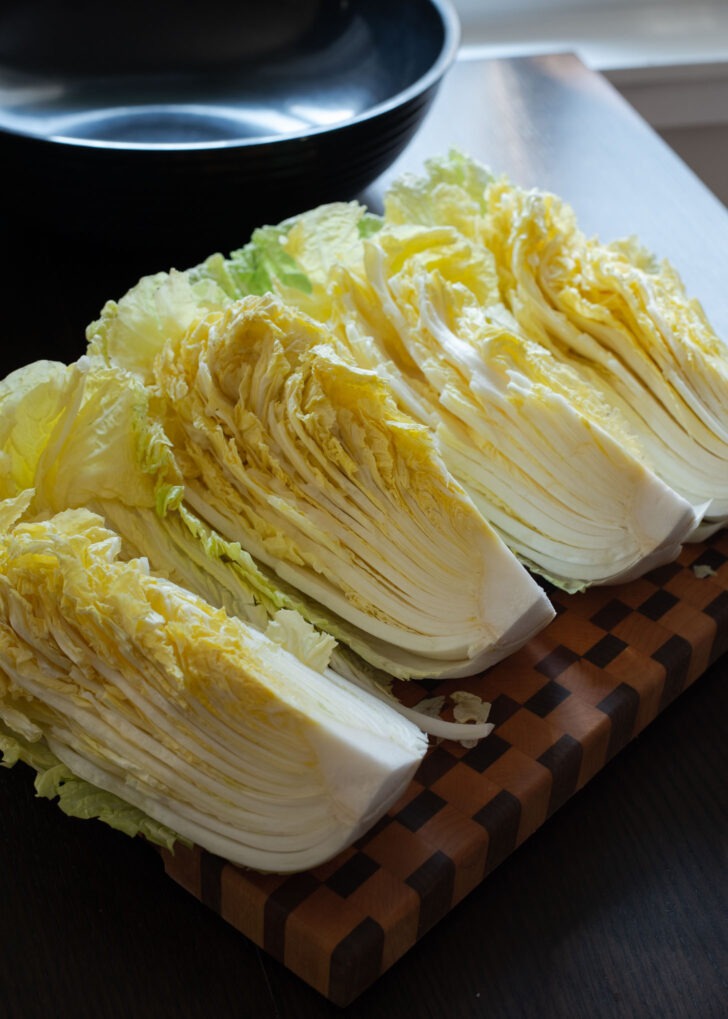
Step 1. Prep The Cabbage
- Quarter the cabbage, and cut off the core.
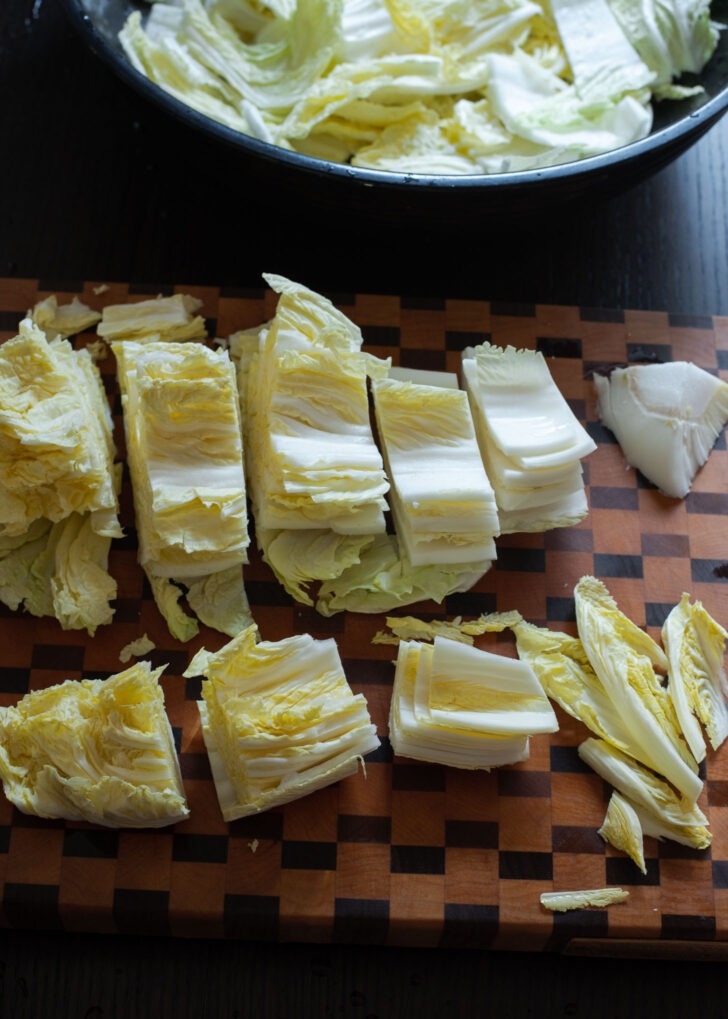
- Rinse the cabbage and chop it into 2-inch pieces.
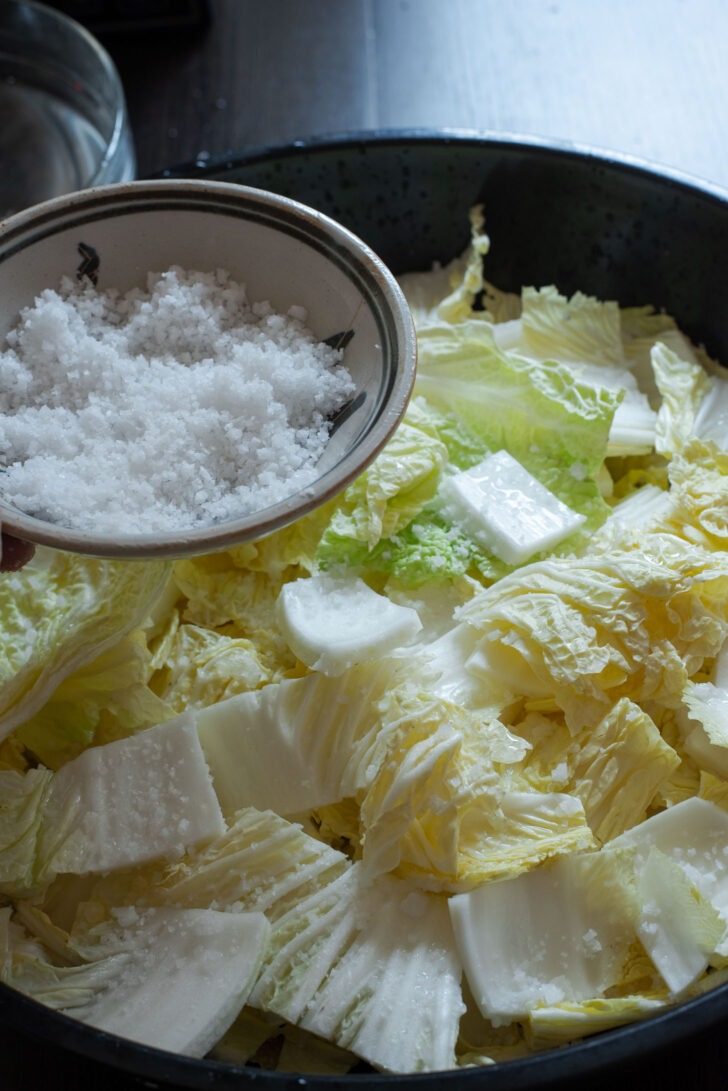
Step 2. Salting
- Spread a small portion of cabbage in a large bowl, sprinkle 3-4 tablespoons of coarse salt (1 tablespoon for kosher salt) evenly, and repeat until all the cabbage is used.
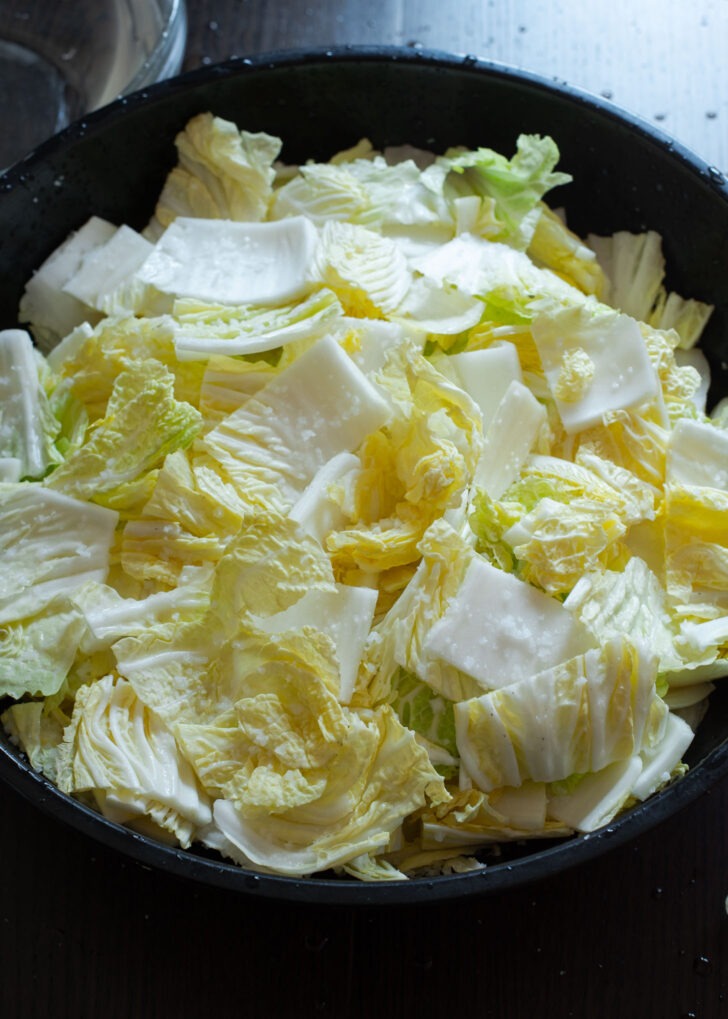
- Sprinkle with water occasionally if the cabbage seems dry and push it down with your hands.
- Let it soak for 1 1/2 to 2 hours, turning it around halfway through.
- As it softens, ready your other ingredients.
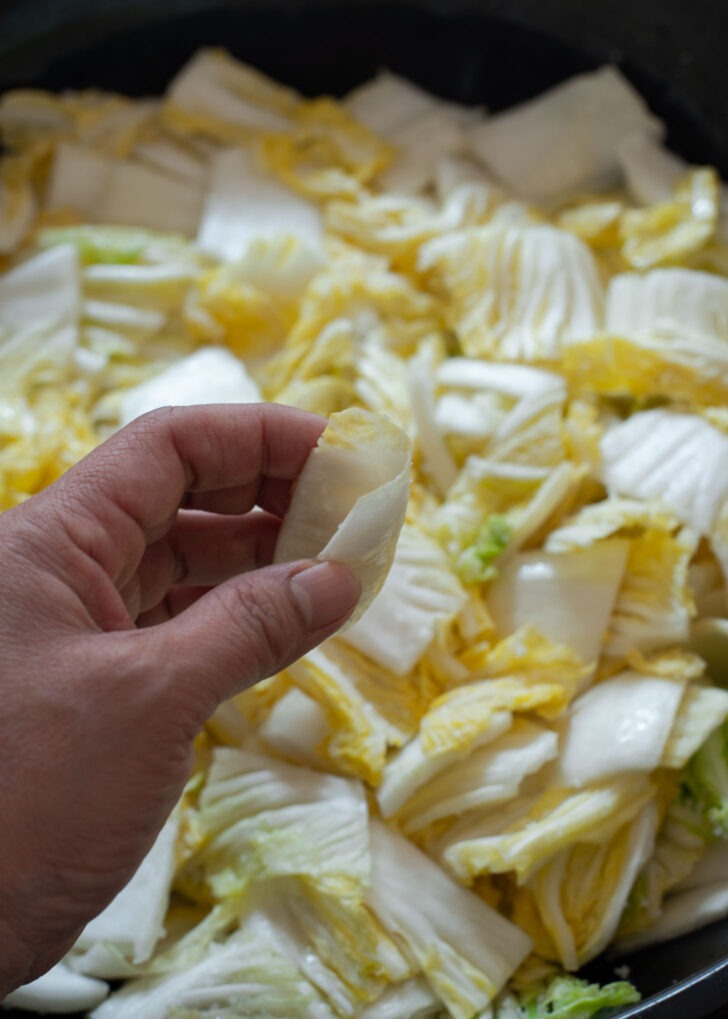
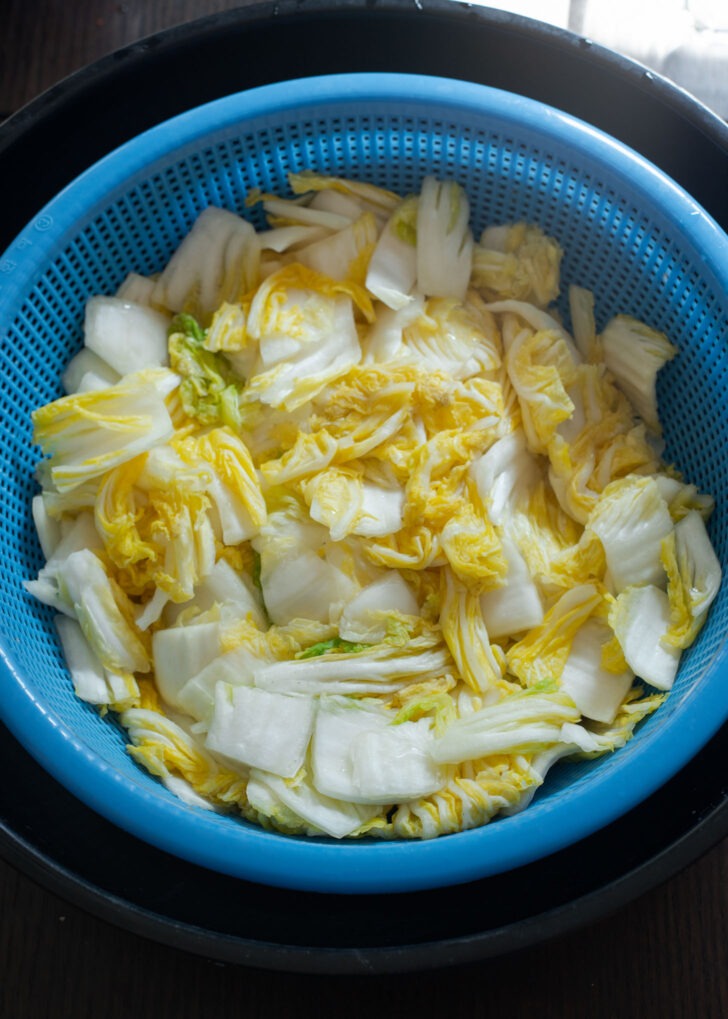
Step 3. Rinsing
- To check if the cabbage brining is done, bend the white stem piece. If it bends without breaking, it is ready.
- Afterward, rinse the cabbage thoroughly three times and drain it well using a large colander.
For Kimchi paste
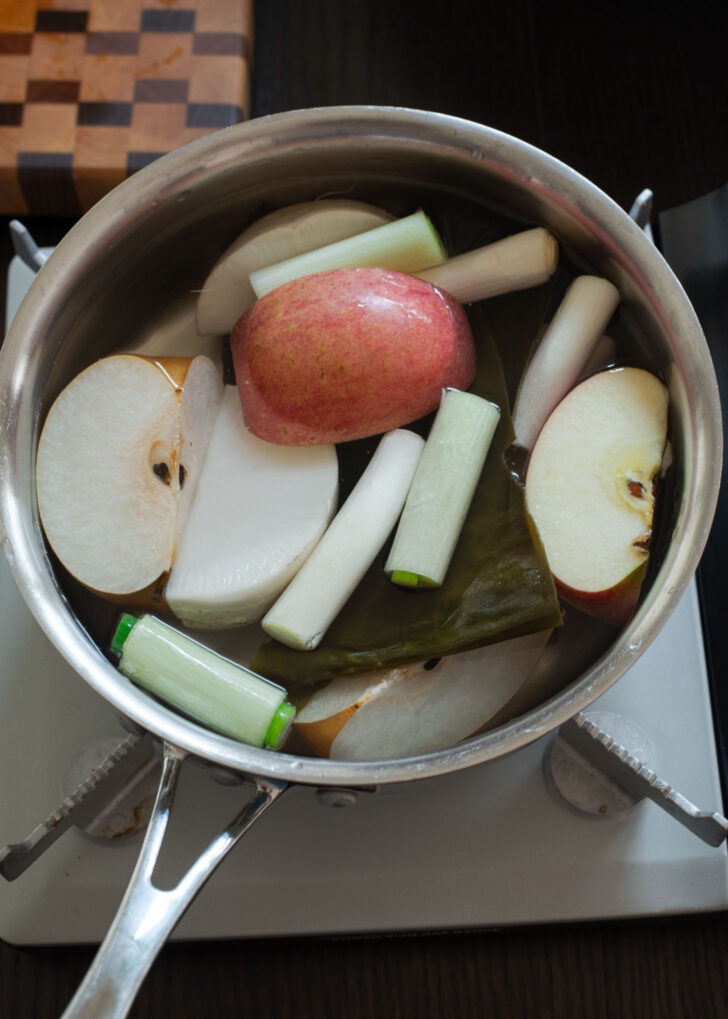
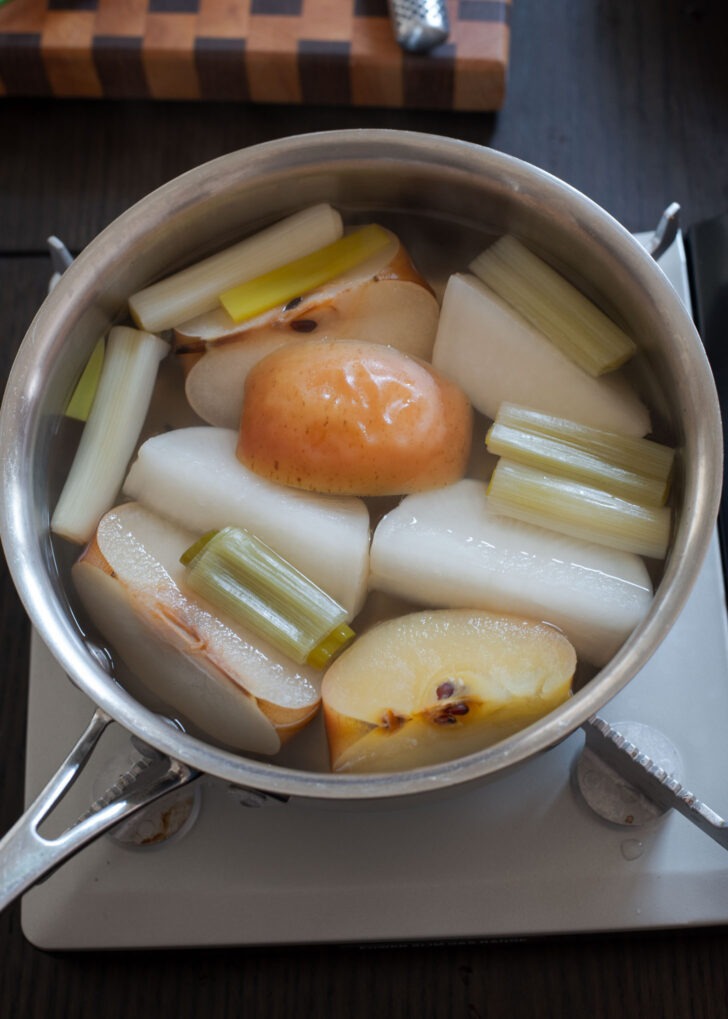
Step 4. Make vegetable-fruit stock
- While the cabbage is brining, make the vegetable-fruit stock by combining pear, apple, radish, onion, dried sea kelp, and water in a pot.
- Boil and then simmer over medium heat for 20 minutes, removing the sea kelp after 5 minutes.
- Discard the ingredients and reserve 1 1/2 cups of stock. Let it cool.


Step 5. Blending the flavors
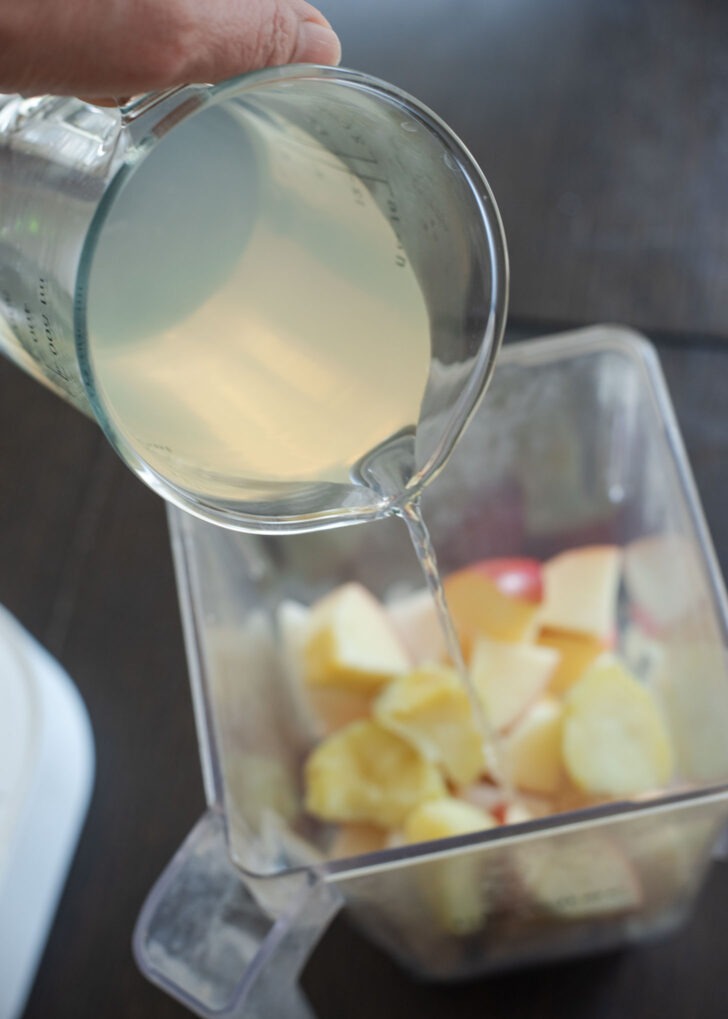
- Make the kimchi paste by blending onion, garlic, ginger, pear, apple, cooked potato (or white rice), and 1/2 cup of stock until smooth.
- If using fresh red chili, add the slices at the end and pulse a few times.
Step 6. Make kimchi paste
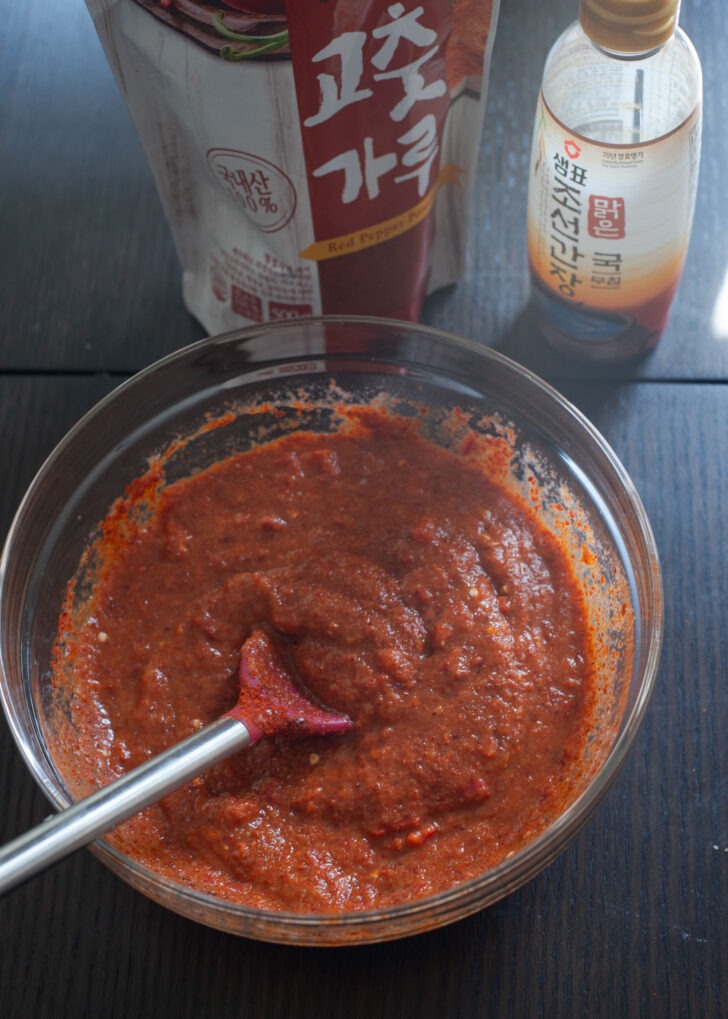
- Pour the puree into a mixing bowl and add Korean chili flakes, Korean soup soy sauce, and mix well.
- Let it sit for 5 minutes so that the chili flakes can absorb the seasoning and rehydrate.
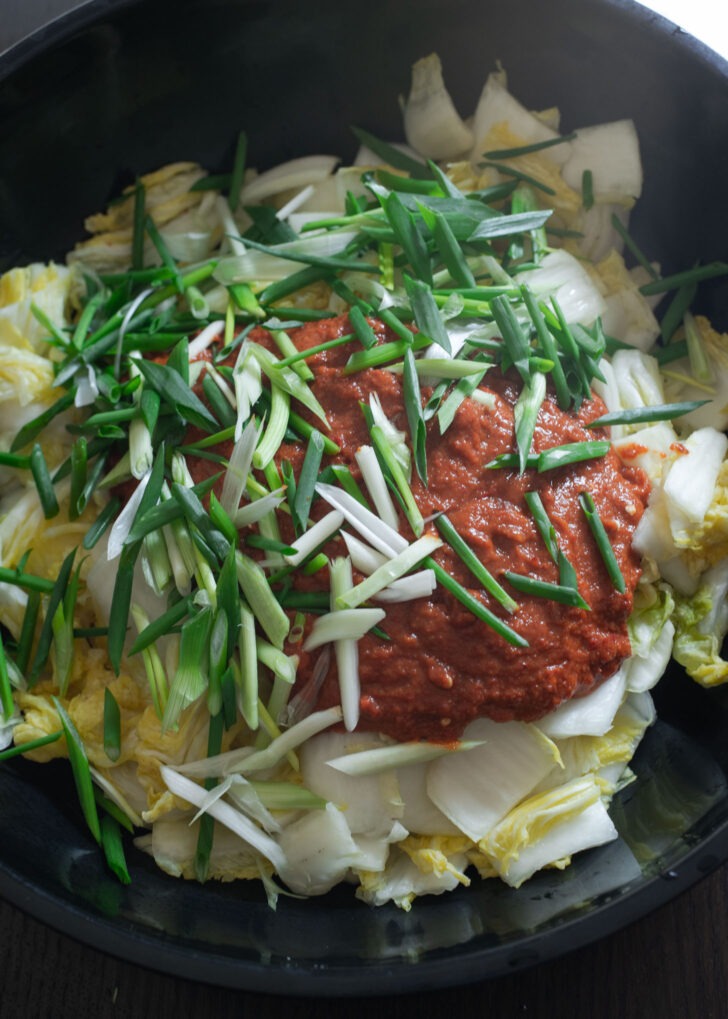
- In a large mixing bowl, combine the cabbage and sliced green onion, and add the kimchi paste.
Tip: To avoid chili stains on your hands, it is recommended to wear kitchen rubber gloves or disposable plastic gloves.
For assembling kimchi
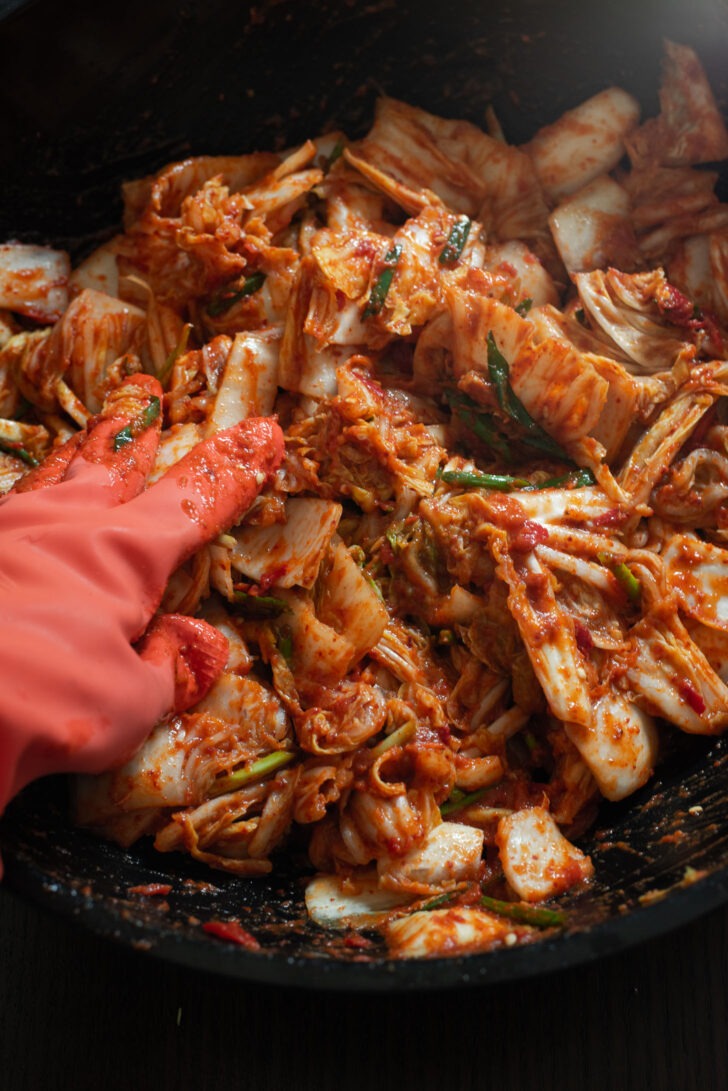
Step 7. Coating & Fermenting
- Coat your cabbage with the zesty mixture.
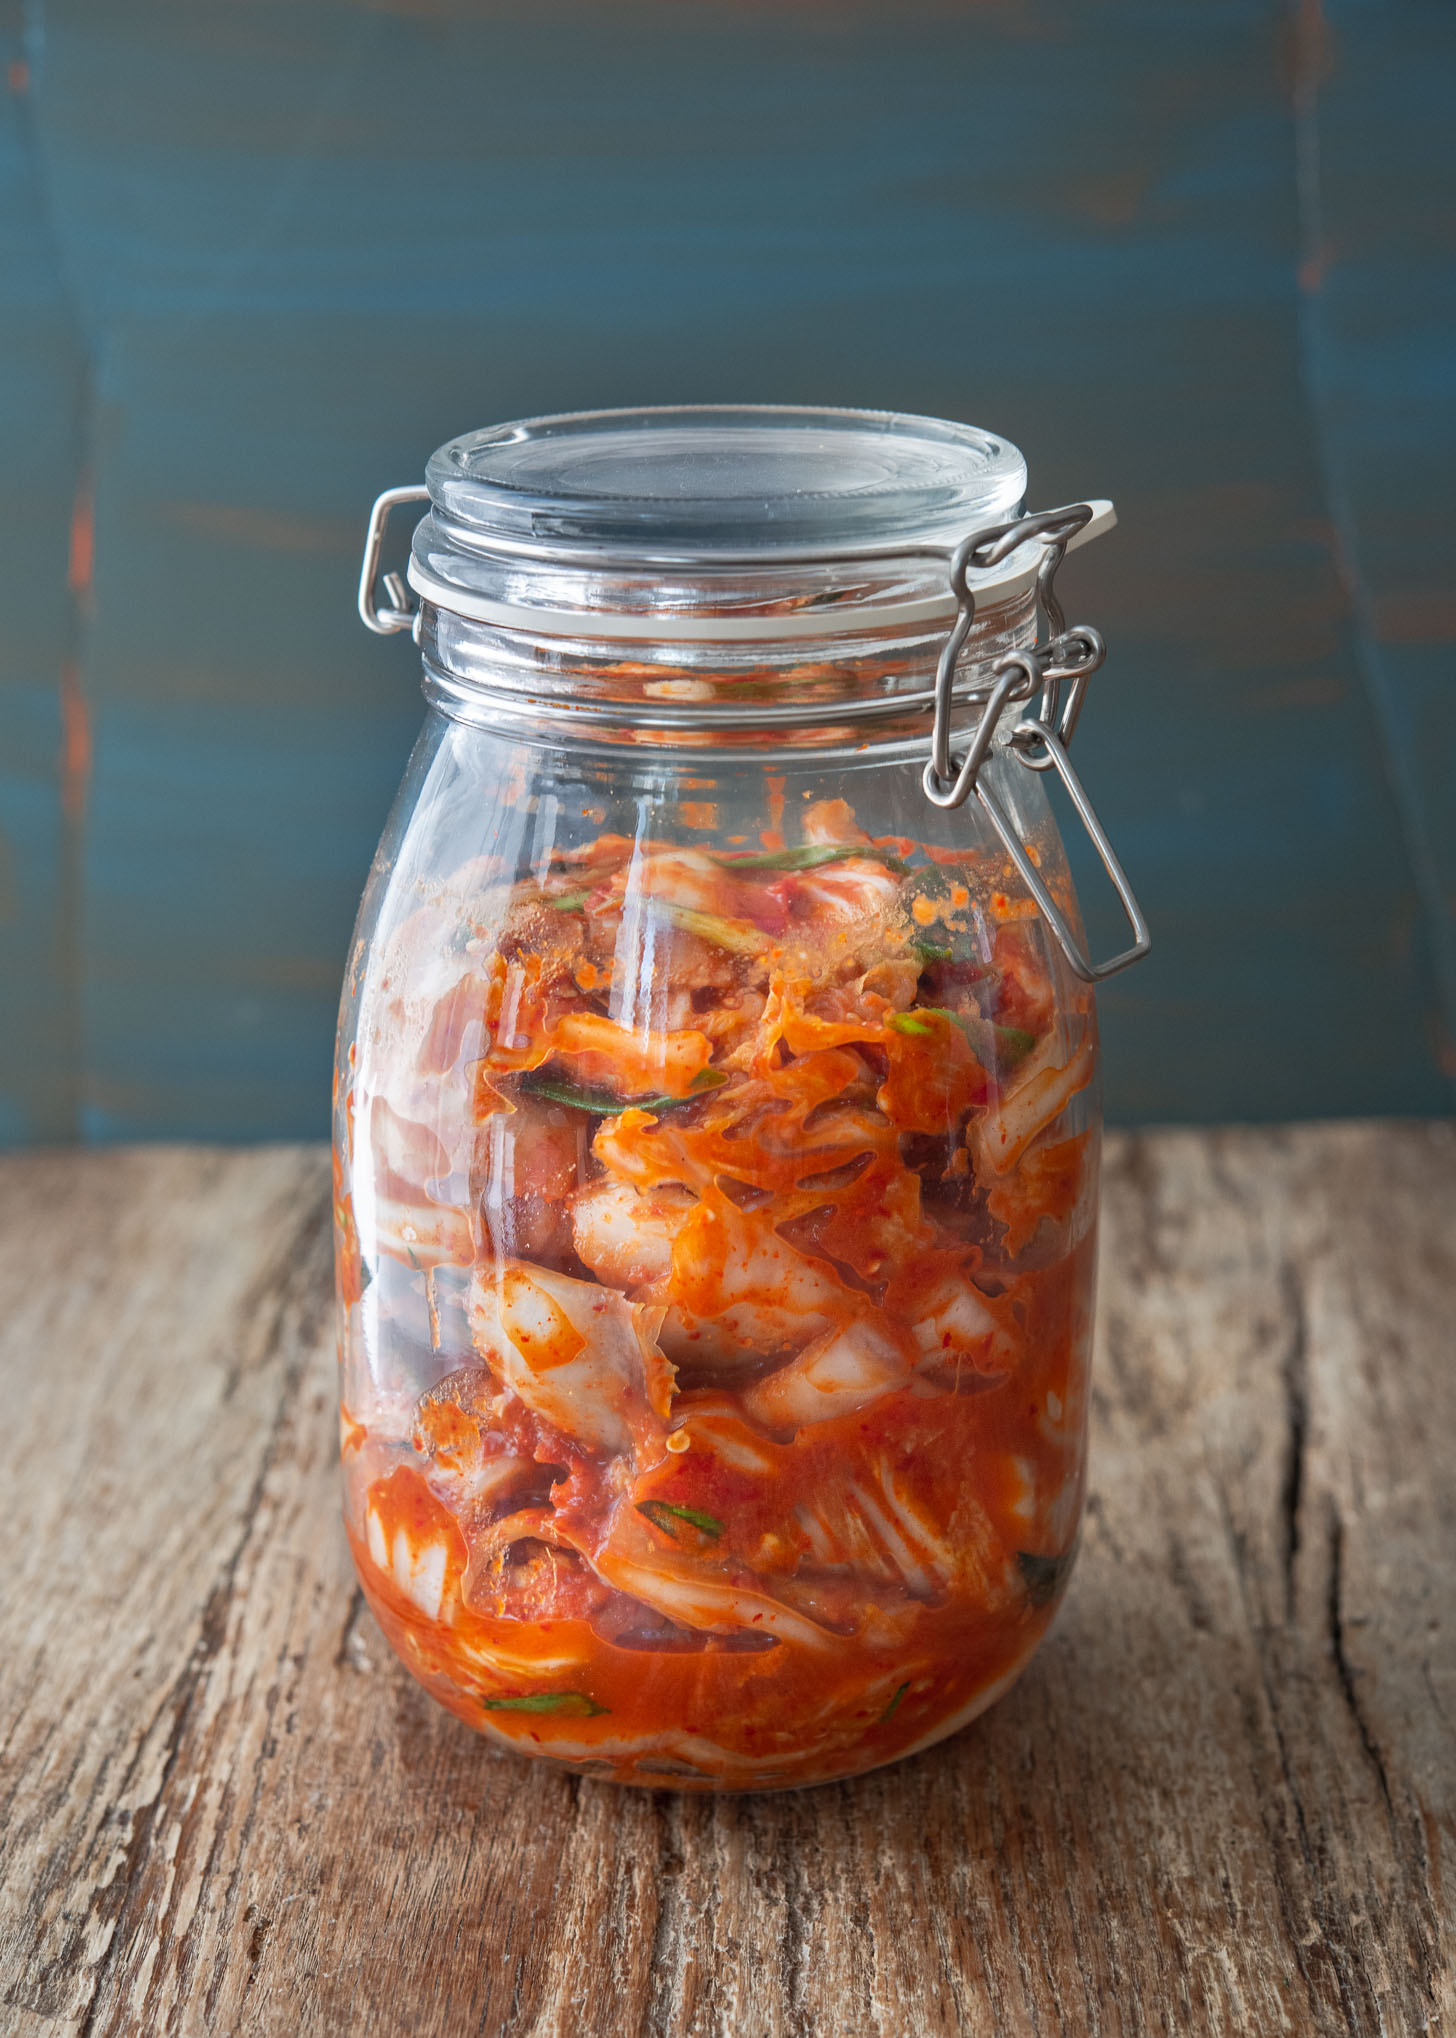
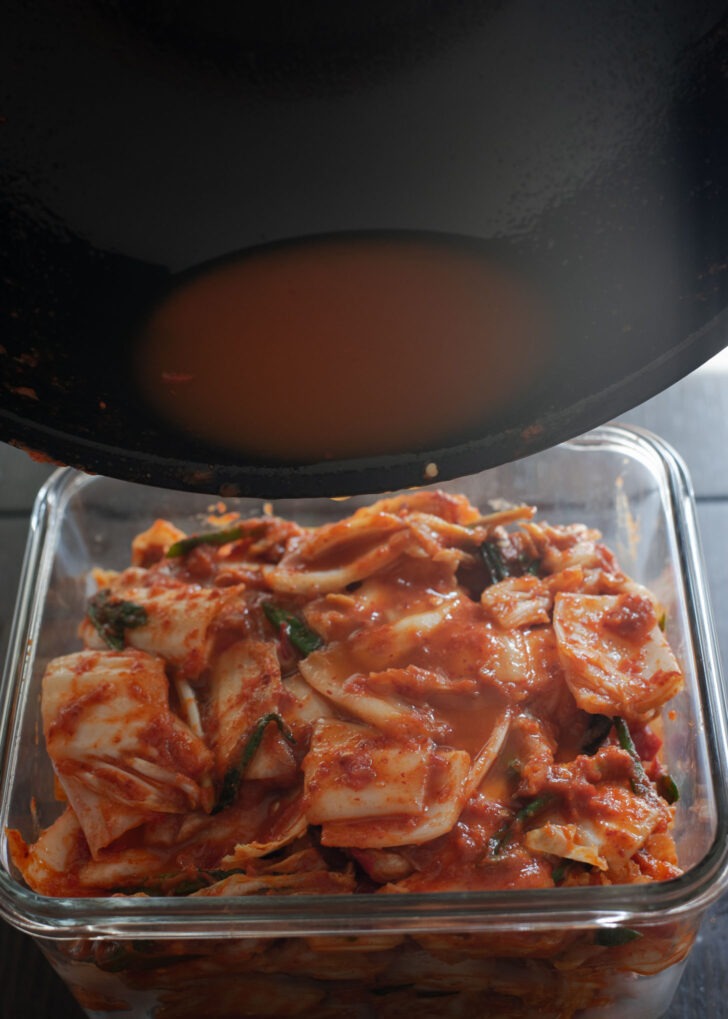
- Transfer the kimchi into a sterilized container and let the fermentation magic begin.
- If you want extra kimchi brine, add the remaining 1 cup of stock to the mixing bowl you assembled the kimchi in. Rinse the bowl to collect all the residue of kimchi paste and pour it over the kimchi.
Remember, the cabbage will continue to yield more brine naturally as it ferments, so avoid adding too much stock.
Fermentation: Tips and Storage Insights
After preparing the kimchi, let it sit at room temperature for 1-2 days (depending on the temperature) to allow the fermentation process to start. Then, transfer the kimchi to the refrigerator and store it for 5-7 days to let the flavors develop fully.
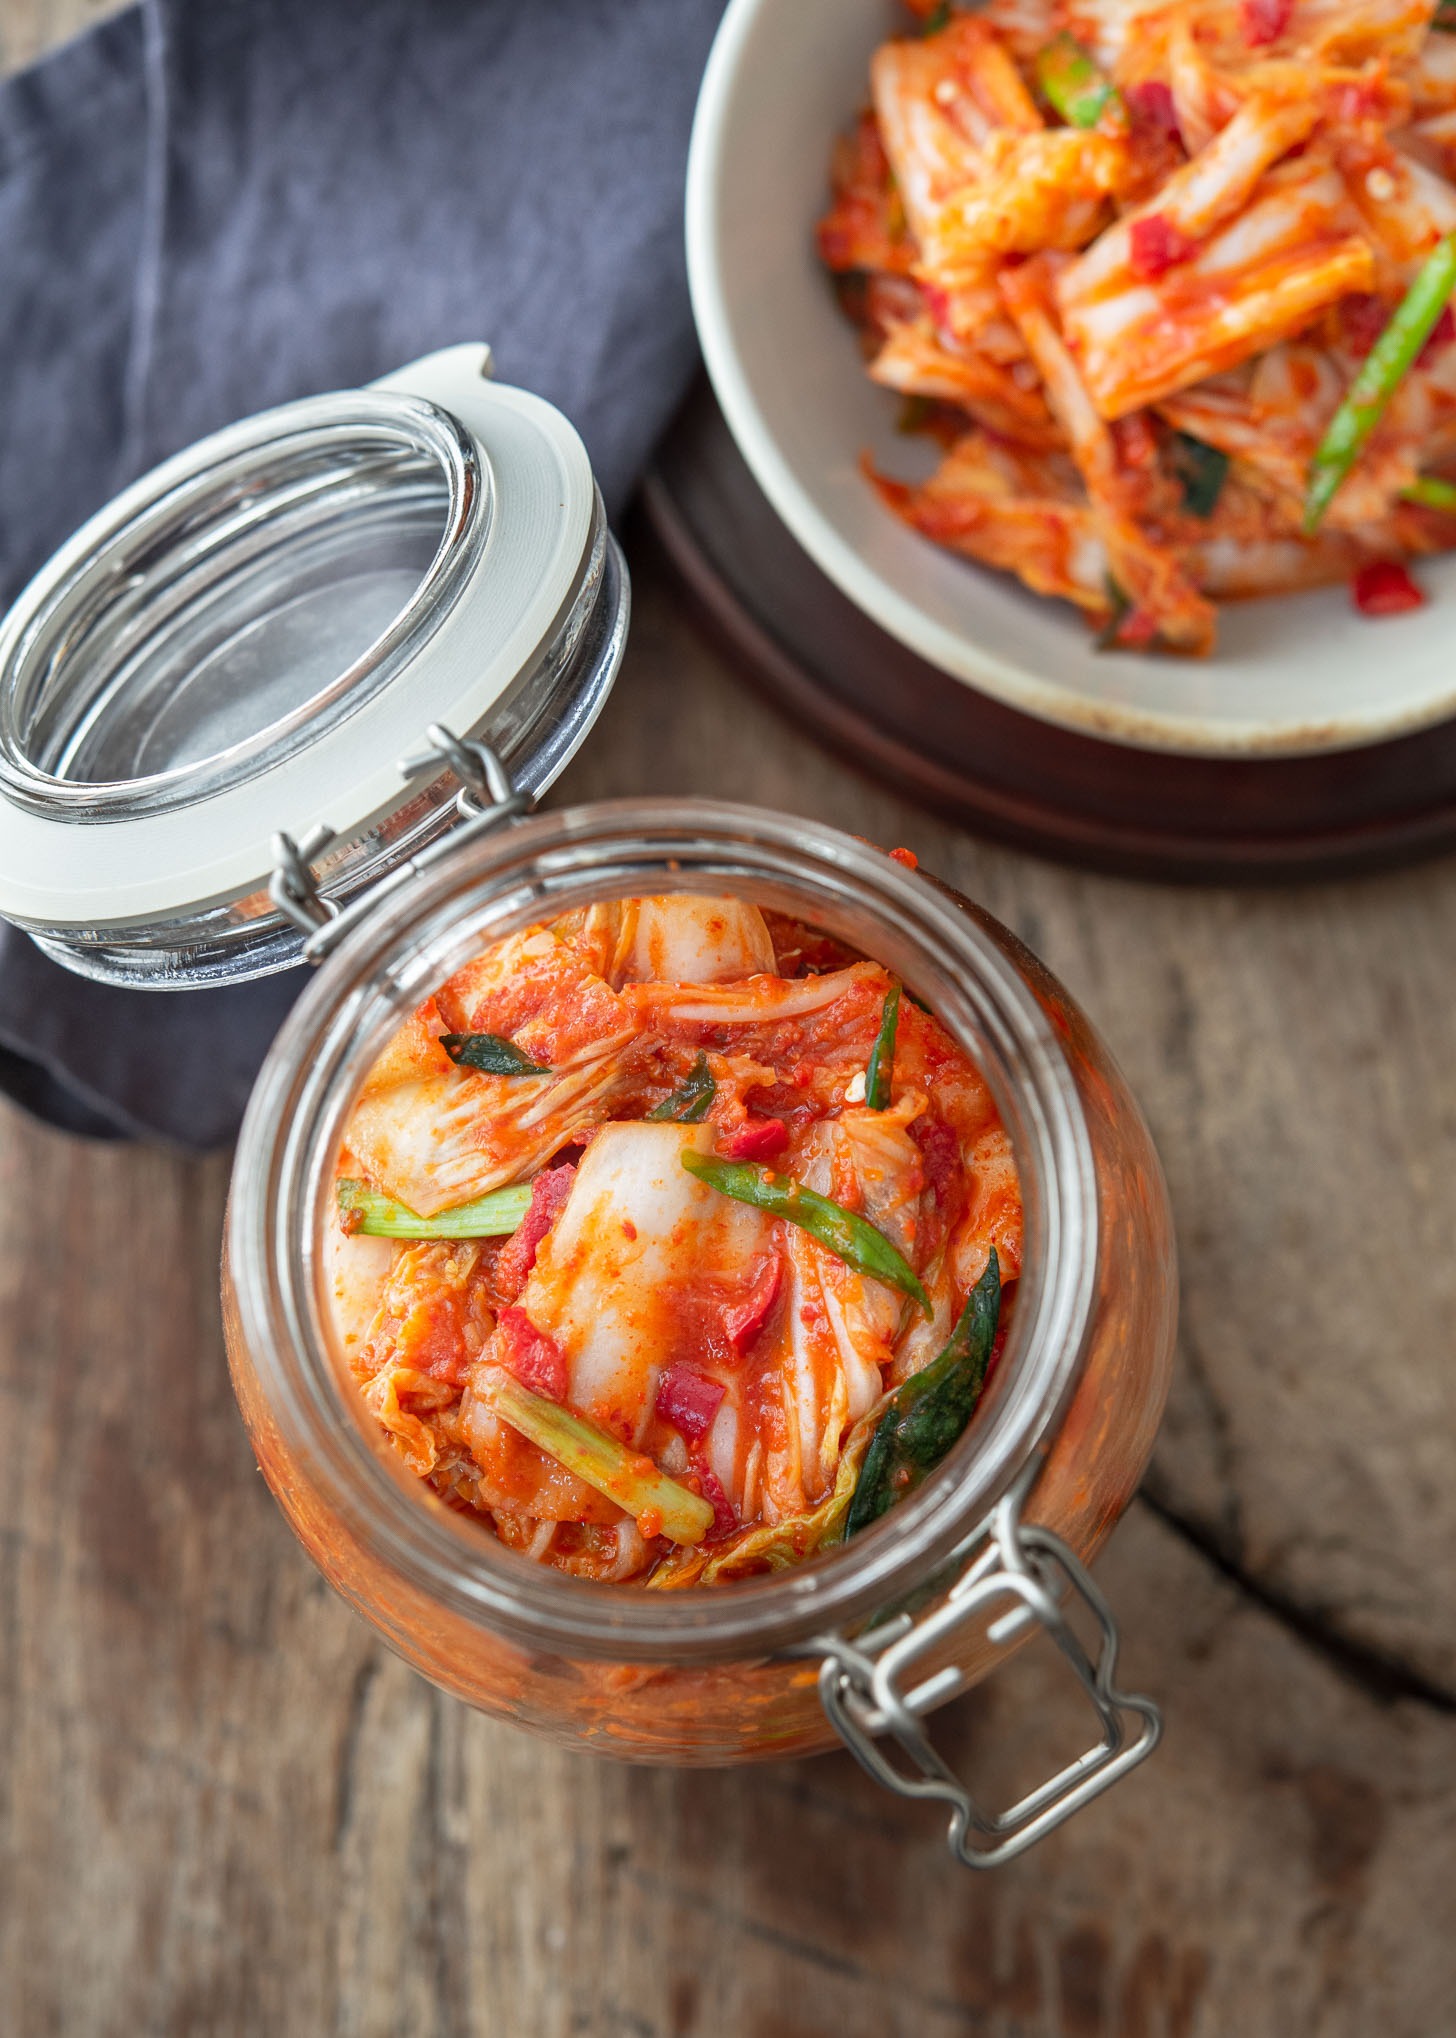
You can also enjoy the kimchi immediately after making it if you prefer a fresh taste. This vegan kimchi can maintain its texture and flavor for several weeks up to 2 months.
Savoring Your Homemade Kimchi
Be creative with your kimchi! Add it to your quick ramen fix, savory kimchi pancake, or zesty kimchi fried rice. Try with easy noodles like bibim guksu, kimchi tomato spaghetti, or turn into comforting kimchi stew with pork. The possibilities are endless!
Tried this vegan kimchi recipe? Leave a comment below, and share your masterpiece on social media. Be sure to tag with #beyondkimchee. And don’t forget to subscribe for more recipes. Happy fermenting!

Ultimate Vegan Kimchi Recipe
Recipe Video
Ingredients
- 4 1/2 lb (2 kg) napa cabbage
- 1 1/2 cup (360 ml) Korean coarse sea salt, or 1/3 cup kosher salt
For vegetable-fruit stock
- 1/2 large onion, or leek, sliced
- 1/4 lb (113 g) Korean radish, or daikon radish, diced
- 2 large pieces dried sea kelp (dashima)
- 1/2 Asian pear or Bosc pear
- 1/2 sweet red apple
- 6 cups (1.4 liter) water
For kimchi paste
- 1/2 large onion, diced
- 10 cloves garlic
- 1-2 inch ginger, peeled and diced
- 1/2 Asian pear or Bosc pear, peeled, cored, and diced
- 1/2 sweet red apple, cored, and diced
- 4 tbsp cooked plain potato, or white rice
- 4-5 fresh red fingerlong chilies, diced, optional
- 2/3 cup (160 ml) Korean chili flakes (gochugaru)
- 4 tbsp Korean soup soy sauce (gukganjang)
- 1 bunch green onion , sliced
Instructions
To salt the cabbage
- Cut the cabbage in half lengthwise, leaving about 3-4 inches of the stem intact. Separate the halves by hand and then repeat the process to make quarters. Rinse the cabbage and chop it into 2-inch pieces.
- Spread a small portion of cabbage in a large bowl, sprinkle 3-4 tablespoons of coarse salt (1 tablespoon for kosher salt) evenly, and repeat until all the cabbage is used. Sprinkle with water occasionally if the cabbage seems dry and push it down with your hands. Let it soak for 1 1/2 to 2 hours, turning it around halfway through.
- One way to check the status of cabbage brining is done is by bending the white stem piece. If it bends without breaking, it is ready. Rinse the cabbage thoroughly 3 times and drain well in a colander.
To make the vegetable stock
- While the cabbage is brining, make the vegetable-fruit stock by combining pear, apple, radish, onion, dried sea kelp, and water in a pot. Boil and then simmer over medium heat for 20 minutes, removing the sea kelp after 5 minutes. Discard the ingredients and reserve 1-1/2 cups of stock. Let it cool.
To make kimchi paste
- Make the kimchi paste by blending onion, garlic, ginger, pear, apple, cooked potato (or white rice), and 1/2 cup of stock until smooth. If using fresh red chili, add the slices at the end and pulse a few times.
- Pour the puree into a mixing bowl and add Korean chili flakes, Korean soup soy sauce, and mix well. Let it sit for 5 minutes so that the chili flakes can absorb the seasoning and rehydrate.
To assemble kimchi
- In a large mixing bowl, combine the cabbage and sliced green onion, add the kimchi paste, and toss well to coat all the cabbage pieces.Note: To avoid chili stains on your hands, it is recommended to wear kitchen gloves or disposable plastic gloves.
- Transfer the kimchi into a storage container. If you want extra kimchi brine, add the remaining 1 cup of stock to the mixing bowl you assembled the kimchi in. Rinse the bowl to collect all the residue of kimchi paste and pour it over the kimchi. Note: Remember, the cabbage will continue to yield more brine naturally as it ferments, so avoid adding too much stock.
- After preparing the kimchi, let it sit at room temperature for 1-2 days (depending on the temperature) to allow the fermentation process to start. Then, transfer the kimchi to the refrigerator and store it for 5-7 days to let the flavors develop fully. Note: You can also enjoy the kimchi immediately after making it if you prefer a fresh taste. This vegan kimchi can maintain its texture and flavor for several weeks up to 2 months.
Notes
- To preserve the flavor of your kimchi, use an airtight container.
- Do not fill the container to the top, but leave at least 1/5 of the container empty to allow the kimchi to expand during fermentation.
- Allow the kimchi to sit at room temperature for 1-2 days, depending on the temperature, and then store it in the refrigerator for an additional 5-7 days for ideal fermentation.
- As kimchi ferments, it creates an odor. To prevent the spread of the odor, keep 1-2 boxes of fridge baking soda in your refrigerator.

❤️❤️❤️ thank you so much for sharing this Recipe!
This looks great! I am constantly trying different vegan kimchi recipes and cannot wait o try it (my mother-in-law has a persimmon tree and we are always trying to figure out ways to use up the fruit!).
In your opinion, do you think that using cooked brown rice as a starch component would be a good substitute? I’ve used white rice and made rice porridge before, I was just wondering about brown rice as an option.
Thank you!
Jaycen
Brown rice will work, but it can change the kimchi color slightly darker. Also brown rice is less starchy.
Thank you! I started a new batch yesterday, we’ll see how it goes! 🙂 Thank you for responding! I am so glad I’ve found your site!
Thank you so much for sharing! I don’t think I will make this recipe because I don’t have a blender and the Eden grocery shop nearby is run by Koreans who make authentic kimchi (and I don’t have to avoid seafood). But I can almost taste most recipes just reading them, like how I can listen to music just looking at the notes (my master’s degree is in piano), and what made your recipe so lovely I couldn’t resist responding was your tone! You’re serious about what you say but it’s really sweet like your persimmon. No wonder you like to add fruit but not sugar to your kimchi! Please keep writing to us about your cooking!
I’ll try this recipe soon, not because I’m vegan but because I’ve recently moved to Uruguay and haven’t found fish sauce or fish powder yet. Also, I have a person in my household with a serious allergy to shellfish so I have to be careful. Thank you for making this available in English!
Yes, this kimchi will be safe for those with shellfish allergy.
Thank you for this recipe, looks awesome and I will give it a try today, but I have a doubt about the potato, I suppose it goes with the stock and everything that is blended? Rice would also be blended here?
Yes, either cooked potato or rice can be used to be blended all together with the other ingredients as specified. Hope it turns out well for you. Thanks.
Great recipes with veg broth and persimmon! I would imagine how good it will be because I love persimmon 😀
Can the onion and garlic be left out in the recipe during the fermentation process?
Onion and Garlic won’t effect the fermentation but they help with the flavor. I would recommend to use less. Omitting entire amount won’t bring the good taste of kimchi
WOWW!! This recipe turned out to perfection!!! The broth is the magic ingredient. And next time I will seek the treasured PERSIMMON to make it even better.
Where did you find those bamboo chopsticks? The brown one that looks like a bamboo stick 🙂 SO cool!
THANK YOU! My Korean wife said our Kimchi is better than her mom’s!
Holly, about the soy sauce for soup. I’ve read that it is gluten-free, as in no wheat is used during the production. Can you as a native speaker confirm, that it contains no grains with gluten just soy? Thanks!
Korean soy sauce for soup comes from the liquid where doenjang block is soaked in salt solution and being fermented. Authentic doenjang block(meju) should be 100% soy, therefore a good soy sauce for soup should be free of any wheat or barley. However, most commercial doenjang paste contains added wheat or rice during the process of making doenjang paste from the meju block to create desirable texture and color. For my understanding doenjnag block(meju) itself is made with 100% soy, but I can’t confirm if all the commercial soy sauce for soup are gluten-free. I highly suggest to read the ingredient label on the soup soy sauce bottle to see if there is any added wheat or other grains.
This recipe is great. A total hit! I used sweet rice flour (rice starch) instead of potato. So this kimchi has a shorter shelf life? About two months? Is that normal with Kimchi? Or does commercial Kimchee have preservatives?
The whole cabbage kimchi can last longer than cut up cabbage kimchi. It doesn’t mean you can’t eat them after two month. You can still eat but it will be really sour and almost mushy to enjoy the flavor and texture. Kimchi can last months in the fridge. They usually don’t have preservative since it is fermented food.
Do you think using seaweed would work well? If so, what kind would you recommend?
This recipe is fantastic. Please post more vegan recipes! You’re very good at creating them.
Thank you so much for this recipe! I had a korean roommate for a few years and her mom always used to send us packages with homemade de-li-cious Kimchi – I loved it!!
I’ve been looking for good Kimchi ever since but the one that comes in cans was never as tasty… So I’m very glad that I found this blog, especially since I started eating mostly vegan a while ago.
I’m going to try this out tomorrow!
Let me tell you – it was amazing!! I can’t wait to do it again, it was finished in no time 😀
Great! You made my day happy!
This is my third time making kimchi and been using this recipe. My partner loves it and ofcourse I am glad I found this recipe.
Good on you.
Thank you so much for making this article! I have eaten kimchi from the store before, but really wanted to try making my own. I was very worried that I would do something wrong with the fermentation and accidentally poison myself! Your article gave me the confidence I needed to try, and the kimchi I made turned out amazing on the first try! I didn’t follow the recipe exactly — I like to be creative in the kitchen — but even my mother (who has never tried kimchi) liked it. I ended up making a sweet and sour soup to add the kimchi to, and that was also fantastic! I will definitely be making more in the future. Thank you again! 🙂
Hi Holly,
Thank you for a wonderful recipe. I tried this recipe and loved the result. I have made vegan kimchi before but I think this is the best one. It is because the broth and additional sweet fruit and pungent soy sauce, I think. Brilliant! I used kombu in the broth and simmered (with kabocha and dried shiitake) per your recipe. I used half of a Fuji apple. I don’t have the Korean soy sauce but I have other fermented soy sauce Thai style (replacing fish sauce) that is vegan. The result is still so yummy.
I will look for that Korean soy sauce in the Korean market. Thank you so much!
Debbie
Thanks for this wonderful recipe. I will definitely try it soon! I’m just a little confused about where the potato comes into the kimchi. Do you blend it with the persimmon?
Hi Nihal
Yes, you will need to blend the potato together with persimmon, onion, garlic, and ginger. Add the fresh chili (if using) at the last minute to pulse. Hope you like this kimchi. Many people have told me that they loved it. Thanks!
Can you substitute the broth with vegetable broth? And I’m not vegan but wanted to avoid fish sauce, so how would chicken broth work?
You can try with vegetable broth. I think the chicken broth will make funny taste in kimchi. Some northern Koreans use beef in kimchi, but personally have not tried yet.
I just made this vegan kimchee (withasian pear, did not find persimmon yet) and it is delicious. Even my picky daughter who has never liked anything with spiciness loved it. I am vegan and I have bookmarked all your kimchee recipes. I was wondering if I use the same type of broth for the other kimchee and used the soy sauce for soup would that replace the fish in the other recipes? Is there anything else I would have to add? Great recipes. I have sent my son to the store for sprite so I can make the radish kimchee later today.
Hi Linda
You can substitute the Korean soy sauce for soup as a substitute for the fish sauce in any kimchi recipe. Great to hear that the vegan kimchi turned out well for you. Yeah!
I have been looking at your recipes for kimchee and am so glad that you have a vegan recipe. I was wondering why the cabbage preparation is so different though from the 3 volume kimchee recipe. In the vegan one you cut the cabbage into 2 inch pieces and in the regular kimchi you just quarter it and put the the other stuff between the leaves. Just wondering why.
Linda
The regular (more authentic) kimchi recipe can survive for the longer storage period due to keeping the whole length of cabbage itself (which gets bundled and hold the kimchi stuffing intact together inside to keep the flavor and the texture fresh longer). Once cabbage gets chopped up, the storage life gets shorter. The authentic whole cabbage kimchi can be stored several month to a year if stored right. The chopped up cabbage kimchi can’t last that long. It will ferment faster and get mushy after 1-2 month of fermenting. Therefore You don’t want to make too much volume of easy method kimchi unless you can finish within 1-2 month. Heep this helps.
I may be dense, but can you tell me what Korean Coarse Sea Salt is? How is it different from regular sea salt and where can I find it?
Love your writing style, brilliant! Can you tell me how long this will keep in the fridge?
Thanks
Hi Alice, it can be kept in the fridge quite long, up to 2 month. But I recommend to consume within a month though. If too fermented, it just doesn’t taste good anymore to eat as is.
Thank you! I love the recipe and can’t wait to use it!
Point of order though. Kimchi is not vegan or vegetarian. Fish (sea creatures in general) are not vegetables. They are animals; therefore, not vegetarian. I am really sick of people assuming that because I’m a vegetarian and not a vegan, I eat fish. I do not eat fish (or any animal including bugs and mollusks). It is an animal. Vegetarians do not eat animals. If you eat fish, you are a pescatarian, not a vegetarian.
This kind of attitude makes it nearly impossible for me to eat out anywhere because people think fish (and sea bugs and mollusks) are swimming broccoli. I can’t count the number of times I’ve had to say I’m vegan (though I eat cheese and eggs and make no actual claim to be vegan) to make sure that people don’t put animals in my food.
Again, love the recipe. I’ll let you know how it turns out. 🙂
Thanks for your comment, Alessandra. I understand how frustrating it must be. I am not a vegetarian nor vegan, but I try to enjoy meat-free meal once a week just to reduce meat consumption in my family’s diet. These days People are paying a full attention to food allergy of others, therefore it would be very nice to consider someone’s diet restriction and understand the do’s and don’t’s as well. Hope you get to try this Kimchi and be able to enjoy it. Please let me know how it turns out!
Holly, the kimchi turned out amazingly. At first I didn’t think it was enough liquid, then I packed it into the jar and it was perfect. Instead of burying it (I live in a flat), I filled a sink with cool water up to the level of the kimchi and put a towel over it. I just moved it to do the dishes then refilled the sink and put the towel back over the sealed jar again. The temperature must have been perfect because it was sooooo good. I put it in and on everything all week.
Store bought kimchi is good, but it tastes so much better when you make it yourself and your instructions were clear and easy to follow. The pictures helped a lot. I love how Korean food is all by hand or to taste. That’s how I’ve always cooked too.
Thank you so much! I will be making this often and for a long, long time. I have already put it in a spot of honour; the family recipe book I got from my mother, who got it from her mother, who got it from her mother… I love this recipe that much!
That is just wonderful Alessandra. I feel so honored that you added this recipe to your family recipe book. Thank you so much!
Just wondering why not use the cooked mushroom and pumpkin for part of the marinade?
Hi Jackie
Youu can add them if you want. The stock has all the flavor melted in without overpowering the flavor of mushroom and pumpkin in the kimchi.
I fell in love with this kimchi recipe! I just did it after reading your blog >.<
I tasted it and it's beautiful! (it's is fermenting now, let's see after 24hrs)
Thank You for sharing this yummy delicious recipe!
HI Danielle
Glad to hear that you tried this kimchi. Hope it ferments to taste wonderful for you.
This looks SOOO GOOD! I can’t wait to try it.
One question: Can I change out the shiitake mushroom for anything else in the broth?
You can leave the mushroom out.
Here’s a problem – I have a friend who is vegan and doesn’t care for spicy foods. Since my misson in life seems to be to feed everyone I know kimchi, how can I make this recipe into a white (baek) kimchi? Will it keep well if I omit the gochugaru? And I’d also like to add maesil syrup – can I substitute that for the persimmon? How much should I use, if so?
Thanks! I”m not Korean, but I do have a kimchi refrigerator. How can anyone live without one? 😉
Judith, it is quite tricky to turn this recipe in to white kimchi. Mainly because we use salted shrimps in white kimchi to maintain its whiteness in color and the flavor. If you use the soy sauce, the white kimchi will turn a little darker. Maesil syrup is great to add in the recipe but you might need to add a little sugar. Maesil syrup alone can make kimchi slightly tarty. I would use 2 tablespoon of maesil syrup plus 1-2 teaspoon sugar. Try with 1 teaspoon of sugar first, taste, then adjust according to your taste. Good luck!
Holly, thanks! Maybe she is not going to get any kimchi for a while. I appreciate the comments on the maesil syrup – I’ve got rather a lot of it, so it will be interesting to figure out how to use it.
Add the maesil syrup in bulgogi, galbi, pork, or chicken recipe. It will tenderize the meat even better and you will love the flavor in it. I would recommend to use this syrup in any Korean dishes that requires a little sugar such as salads or any meat dishes.
Oops, didn’t see this earlier – what a good idea. Thanks!
Hi Holly! Can you use a little sweet potato instead of the potato? I am on a program where I can’t have any added sugar or white potatoes.
Try with cooked white short grain rice instead. I have not tried with sweet potato, so I can’t tell you how it will turn out.
You can bet I’ll try this recipe soon! Also, I’ve wanted to try to make doenjang since I saw the wonderful Koream movie of the same name. I’m going to check your site for a vegan recipe for doenjang. If you don’t have one, maybe you will make all us vegans lucky, and write one 🙂 The more vegan Korean recipes, the better!
Although I am not a vegan, I like to make occasional vegan meal for the family just to avoid too much meat consumption. Using Doenjang in recipes to make vegan is great way to obtain protein and other good bacteria in the body. I will think of more recipes with doenjang to be vegan worthy. Cheers!
Thank you! Another quick question. Is the doenjang that is available in the store usually vegan?
Yes, doenjang is vegan friendly
Thank you. This leads to another question. Is it hard to make doenjang at home?
Yes, somewhat. You want to make it in an outdoor kitchen due to a potent smell during the process.
This is REFRESHING. I never knew persimmon could be well blended with kimchi soh. Love this post, and Hail Holly. From Laila in Indonesia.
One word. Genius! I love following your step by step pictures and learn how you cook. Your blog is always one of fun blogs I always look forward to. 🙂 Pinned!
I have never come across a vegan kimchi recipe. This sounds great.
Terrific recipe! You really do know your kimchi. 😉 Never thought it could be made vegan – but you proved it can be.
First, I am so glad that you are blogging again! Second, I am so excited that you created this recipe. I made vegan kimchi once and was so frustrated and disappointed. I can’t wait to try your version!